Made My First Unity 3D WebGL Game!
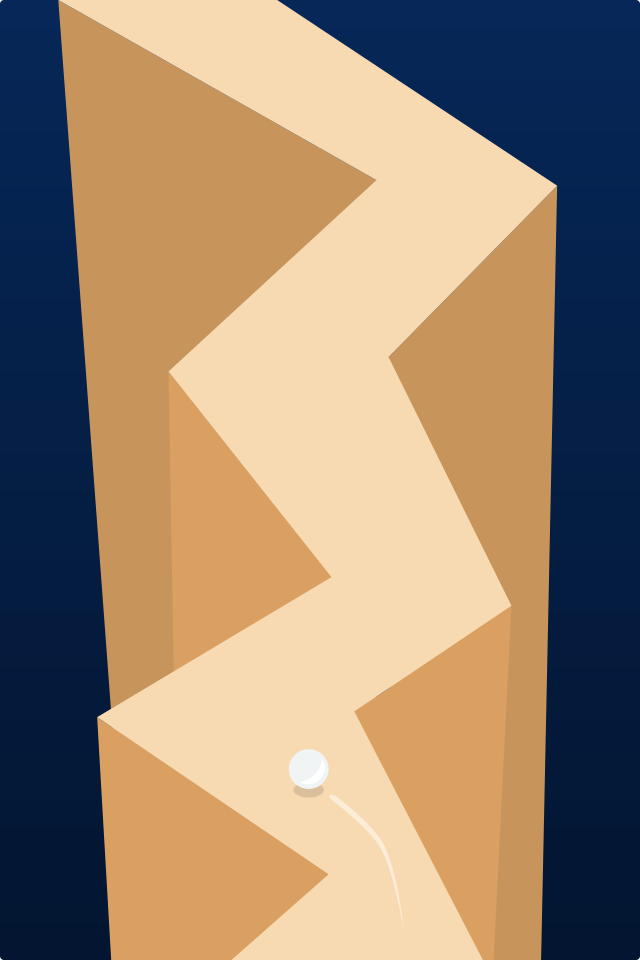
This is my experience of making Last Ball, an endless marble runner, the first game WebGL made using Unity 3D.
But let me kick off with a meme.

And I’ve been making games for 30 years now…:)
Nowhere To Hide
The first contact I’ve had with Unity 3D was around 2012, someone asked me for tiny app where you can rotate a camera around a car. Then, in 2015, at my previous company, I did some rendering/speed tests (1-2 days of coding) of whether to choose Unity as a game engine to develop a sequel of a Flash game – but the idea was rejected in favour of Flash. Coming to think of, bad mistake on the management’s part.
Despite tens of years in professional, industry and indie, game development, I’ve only worked on two 3D games, doing 3D things. Both while at Gameloft, one was a port of the first Asphalt game for a random phone and this was back in 2006. But last year, I’ve decided to change this: finally learn Unity and do my first 3D game as an indie.
My long term goal is to make Orbital Decay 2. In 3D. For WebGL. So I had to start somewhere, by making a few test 3D WebGL games. Every journey starts with the first step? You know it.
And, in this current day, as a game developer, knowing Unity is a plus for getting more jobs. Really, you can’t hide from it. Or from it’s sibling, Unreal. But I wouldn’t bet on Unreal. They picked the wrong fight with Apple 😀
Stop. C# Time!
I might have mentioned in a previous piece that I’ve had to learn C# first. If you haven’t read it, yeah, I’ve had to learn C# first. So I’ve bought “C# 7.0 in a Nutshell” and “C# in Depth”. Read – skimmed – maybe a quarter of the former and not one page of the later. Got my bearings and off I went to see what the Unity Scripting API offers.
Hardware Requirements
My PC is 8 years old. It consists of a AMD A8-3850 APU, 8Gb RAM, a Radeon 6670 graphics card (which was low end when I bought it…) and a SSD. Despite the aged hardware, the Unity editor runs pretty good, in terms of navigating, rendering and running the game, although it does have problems updating after modifying scripts (it sometimes takes 10-15 seconds to update). This seems to happen with 2020.1 versions (2019.x versions were much more fluid).
Exporting the game to WebGL is an entirely different story, see the chapter below.
Asset Pipeline: 2D
With the previous 2D games made with Cocos Creator, I had established a certain pipeline/routing of importing 2D/sprites: export elements from Inkscape (or Gimp) as individual files. Then, use Shoebox to automatically pack them in one atlas (a png and a plist), then Cocos Creator would parse/import them.
As a side note, you may want, for WebGL games, to have the least amount of draw calls, thus pack all possible sprites in atlases.
For Unity, it works slightly different. After exporting from Inkscape as individual graphic files, you would need to create a Sprite Atlas and use the folder where you’ve exported the graphic files as “Objects For Packing”. Then, Unity would pack and use them automatically.
It is also possible to pack individual files with ShoeBox/TexturePacker into a big PNG, then use Unity 2D Sprite Editor to define sprites manually. However, I find this difficult to maintain, especially if you have to change lots of graphic assets.
Asset Pipeline: 3D
Last Ball is not crazy in terms of 3D models. However, I was afraid that I’d have to learn Blender to do even those basic shapes. Luckily, Unity has the excellent ProBuilder plugin, which is comes in handy for this type of work.
All the 3D models – inspired by a very old game named Highway Encounter – were done using ProBuilder. Since they have no textures, it was even easier than I previously thought.
Even if you use Asset Store for ready-made assets, ProBuilder will come in handy to make small modifications, alter texture UV, etc.
But it does come with a learning curve. I was luckly because I did lots of 3D modelling before, using Truspace and, to a smaller extent, 3D Max, so concepts and workflow were familiar. If you haven’t done this before…good luck 🙂
It All Looks Familiar…
Cocos Creator has a similar look and feel as Unity, in terms of, well, pretty much everything. The component system, inspector, scene tree, layout, the animation sub-system, the physics engine, if you’ve worked with them in CC, making the transition to Unity is eased in.
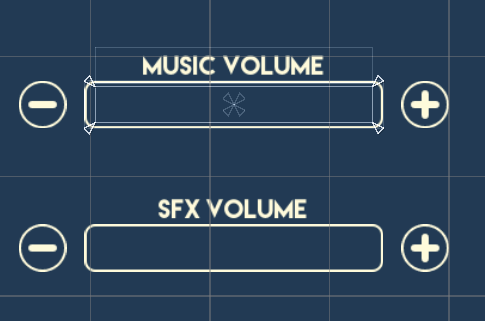
I found, at first, quite confusing how to work with the UI layout and what all those bounding boxes and arrows are meant to be. It’s really confusing (and I think Cocos Creator does a better job at presenting this).

After some tinkering, I think I might have got it. If you’re a beginner, it might help to check a tutorial or some samples on the matter.
Game Architecture
Having used InversifyJS for my previous Cocos Creator games as a Dependency Injection Container, I’ve decided to use one for Unity as well. I’ve settled to Zenject (and its signals library), which has native Unity integration and is one of the few C# DI containers to be actively maintained. After a brief adjustment period, I’ve been able to replicate my previous games architecture in Unity.
Zenject comes with example projects and extensive documentation, even so, it’s a pretty convoluted piece of software that, in itself, will be difficult to learn. If you have previous experience with DI containers, it’s definitely worth learning as it will make your code cleaner than using GameObject.Find.
Package Manager Mess
You can install assets from the Asset Store. Then, you can install packages using Unity Package Manager (upm, very similar with npm). But you can install 3rd party unitypackage files through Assets | Import Package. Finally, you can use NuGet for Unity, to have support for NuGet packages, as I’m using the NGettext library for localization.
This diversity makes it difficult if you plan on taking a package-centring approach to structure the project. If you go for the npm/upm route and create internally re-usable packages, if such package depends on Zenject (an externally installed plugin) or NGettext (that comes from NuGet), it’s turning to an interesting setup hell.
Moreover (although this is a common fact for NPM), you might want to use internal packages. In this case, in order to benefit from package versioning, you’ll also want a local NPM package server, either physical computer or through a Docker container, something like Verdaccio. But…who has time to setup all these? 🙂
Achieving the Look – Materials, Lighting and Post Processing
The initial mockups I did (in Inkscape) looked like these:

The Red Mockup 
The Sand Mockup
Arguably, one can do such a game in 2D, no problem, but it’s hard to do 2D mockups of a 3D game when you’re not an artist 😀
Due to how real 3D lightning and shading works, I found myself in a real pickle trying to achieve this kind of illustration look. So I’ve ended up spending lot of time learning about lighting and material setup in order to achieve this.
Should be mentioned that this is all URP/LWRP. And I’m only using the Lit shader, one dynamic directional light, exponential squared fog and the Bloom post-processing shader.
I found that Bloom ties everything together nicely, in a sort of dreamy way, which fits the game setup quite well. It’s not a must use, though.
The 3D Physics Engine
If you’ve had, like me, previous experience using a physics engine, even a 2D one like Box2D, it was good to see that concepts are similar. This was a great boost because I was just able to cursory explore the API and get things done right way.
The terrain (the ground) in Last Ball is generated dynamically, in chunks. After some testing, I found that despite the chunks being a perfectly vertically aligned, the ball would just jump with no reason at the edges of the chunks. After some investigation, tuning up the Project Settings | Physics, Default Contact Offset to 0.001 would fix this issue.
Exporting For WebGL
This is a large topic in itself, so I’ve extracted it in a separate piece. Read Building WebGL Games With Unity: A Primer.
But What If You’re A Beginner?
If you’ve had no previous experience with neither a game middle-ware or a programming language, then it would help you to find or sign up for some courseware.
If you’ve had some experience programming, you may find useful to install samples like Roll-A-Ball or the Karting Microgame and tinker with them (and follow the tutorials provided – optional step 🙂 ).
I found myself intimidated by the amount of things to learn about Unity in order to do a basic 3D game. Especially after making many 2D games, as a solo developer that has to take care of everything, from the graphics concept to programming and design, it’s a lot to learn.
